MATING:
NOTE: if you are not familiar with the layout of SolidWorks, then click here to familiarize yourself with the layout
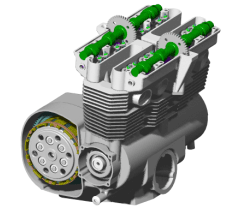
SolidWorks has a simple, yet powerful mating feature. It is used for joining parts in an assembly and simulating how they fit together and move together. The picture of the engine above shows an intricate assembly. This tutorial will cover the most basic mates that we will use to simulate simple mechanical systems. To use mates we will be working with more than one part and therefore must be in the assembly mode of SolidWorks. To enter this mode follow these steps:
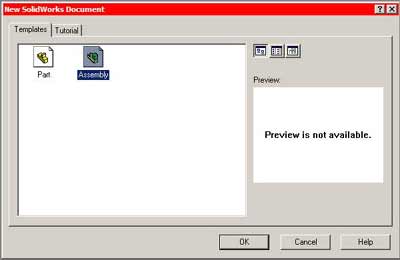
Start SolidWorks and goto file->new
Double click the "assembly" icon:
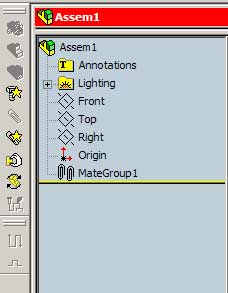
you will notice a new toolbar appearing to the left of the screen. This is the only noticeable difference between part mode, and assembly mode:
This tutorial uses part files from the parts.zip archive. Make sure you download and extract the files to your computer before continuing...
Concentric Mate:
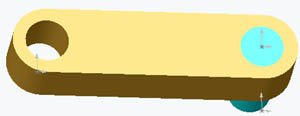
The most common mate is called a concentric mate, and as the name implies, it is a mate between two concentric features. Any time you want a pinned connection or a piston cylinder type connection you will use a concentric mate. We will mate a pin to a link in the following example:
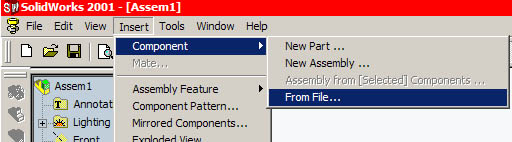
First you will add the pin to the assembly. Goto Insert->Component->From File
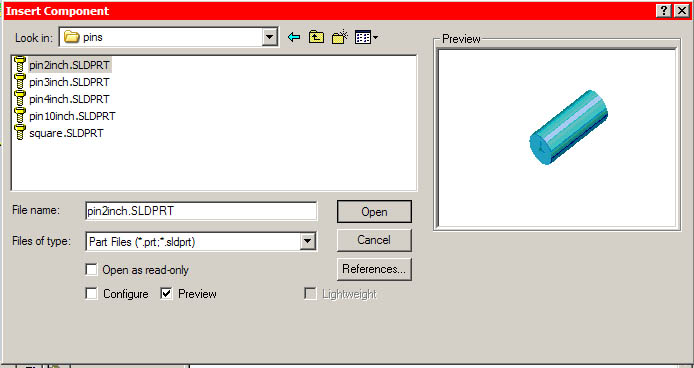
Find the "Pins" folder and double click "pin2inch.SLDPRT"
Click anywhere on the screen to place the part near to where you want it.
NOTE: In solidworks assembly mode ,the FIRST part you insert is automatically fixed in space. This means it can not rotate or translate. Every other part you add is "floated" in space which means it can rotate and translate. For more information about fixing and floating parts please see the Planar Joints Tutorial.
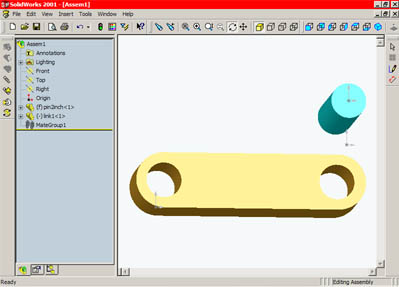
To add the link follow the same steps for adding the pin. Add "link1.SLDPRT" from the "Links" folder
Your screen should now look similar to this:
Select the Mate icon
![]() from the assembly toolbar and mate options will appear. Select the inside face
of the hole on the link and the outside face (circumference) of the pin. Watch
this animation for clarification:
from the assembly toolbar and mate options will appear. Select the inside face
of the hole on the link and the outside face (circumference) of the pin. Watch
this animation for clarification:
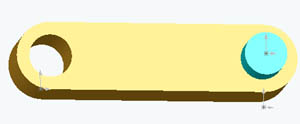
Your assembly should now look similar to this:
To check that the mate worked try moving the link
around the screen using the move component button
![]() .
The link will remain concentric with the pin, although it can move parallel to
the pin (and even off it).
.
The link will remain concentric with the pin, although it can move parallel to
the pin (and even off it).
To further restrict our pin we will want to do a second mate:
Coincident Mate:
A coincident mate, like the name sounds, is a mate between two features that you want to coincide with each other. Generally we use it for making two planes parallel and coincident. In this tutorial we will use it to mount the link onto the pin so that it cannot fall off of it. When we do this, the link will spin around the pin, but it will not be able to slide up and down the pin. Follow these steps to achieve this mate:
Click the mate button
![]() on the assembly toolbar
on the assembly toolbar
Select the top face of the link and the top face of the
pin. If you can't easily select the surfaces, use the zoom
![]() and move buttons
and move buttons
![]() to navigate around the object until you can clearly see the features. Watch the
following animation for clarification:
to navigate around the object until you can clearly see the features. Watch the
following animation for clarification:
[NOTE: you can also use the middle mouse scroll button to zoom and rotate]
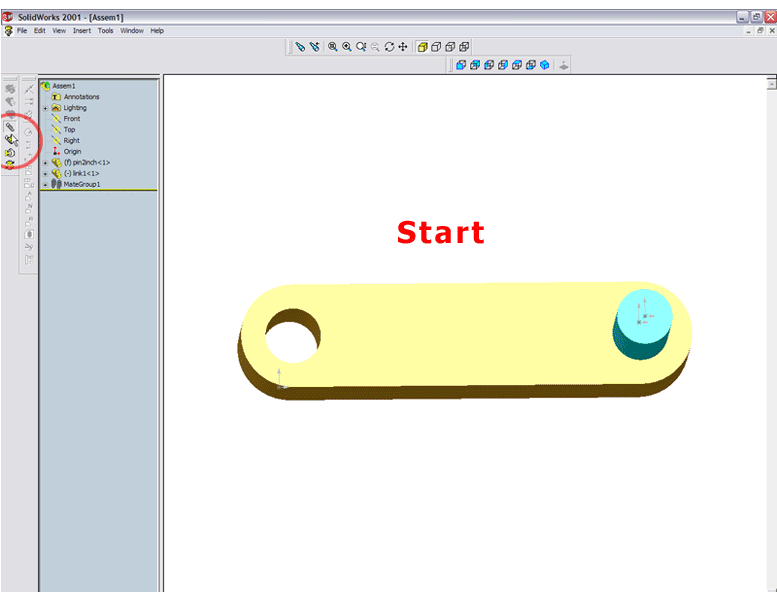
Your assembly should now look similar to this:
To check that the mate worked try moving the link
around the screen using the "Move Component" button
![]() .
The movement of the link movement should be restricted to be concentric with the
pin and parallel with the top of the pin.
.
The movement of the link movement should be restricted to be concentric with the
pin and parallel with the top of the pin.
you are now ready to try mating exercise 1
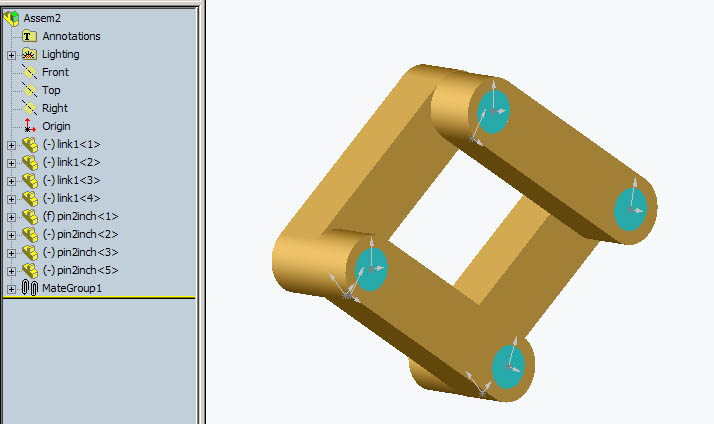
Try to create the following assembly for more practice:
Troubleshooting:
it is always a good idea to position the
part close to its final mated position before you set up the mate. You can move
the part using the move component button
![]() .
.
If you mess up badly, you can always edit->undo.
Likewise, if you want to go back to a certain point, you can use the undo
list
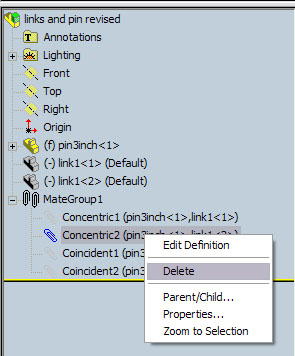
![]() to see your undo options. If this does not work, Solidworks keeps a record of
all mates in the Feature Manager Design Tree under 'MateGroup#' If you expand
this list, you can manually delete any mates you have made by selecting the mate
and then hitting Delete on the keyboard. Likewise, you can right click and
select delete:
to see your undo options. If this does not work, Solidworks keeps a record of
all mates in the Feature Manager Design Tree under 'MateGroup#' If you expand
this list, you can manually delete any mates you have made by selecting the mate
and then hitting Delete on the keyboard. Likewise, you can right click and
select delete: